Kia Niro: DCT(Dual Clutch Transmission) System / Special service tools
Kia Niro 2017 (DE HEV) Service Manual / DCT(Dual Clutch Transmission) System / Special service tools
| Special Service Tools |
|
Tool Name / Number |
Illustration |
Description |
|
Engine support fixture (bar) 09200-3N000 |
|
Used for holding engine assembly when removing / installing transmission
Used with the supporter (09200-2S000) and adapter (09200-2W000) |
|
Engine support fixture (supporter) A: 09200-2S000 B: 09200-2S100 C: 09200-2S200 |
|
Used for holding engine assembly when removing / installing transmission
Used with the bar (09200-3N000) and adapter (09200-2W000) |
|
Engine support fixture (adapter) 09200-2W000 |
|
Used for holding engine assembly when removing / installing transmission
Used with the bar (09200-3N000) and supporter (09200-2S000) |
|
Oil seal installer A: 09430-C1190 (Installer) B: 09231-H1100 (Handle) |
|
Used for installing differential oil seal |
|
Inhibitor switch guide pin 0K948-E4000 |
|
Used for fixing "N" range when installing inhibitor switch |
|
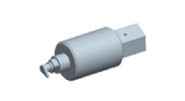
Clutch actuator remover 09430-G2100 |
|
Used for removing clutch actuator assembly |
|
Dual clutch remover 09430-C1180 |
|
Used for removing dual clutch assembly |
|
Dual clutch installer 09430-2A240 |
|
Used for installing dual clutch assembly |
|
Clutch actuator adjustment jig 09430-F0100 |
|
Used for adjusting clutch actuator Used with the clutch actuator adjuster (09430-C1300) |
|
Clutch actuator adjuster 09430-C1300 |
|
Used for adjusting clutch actuator Used with the clutch actuator adjustment jig (09430-F0100) |
| ※ Engine support fixture special tool assembly drawing |

 Specifications
Specifications
Dual Clutch Transmission
Transmission model
D6KF1
Engine model
Gasoline 1.6
Clutch Type
...
 Troubleshooting
Troubleshooting
Trouble symptom
Probable cause
Remedy
Warning lamp ""E"" is illuminated(Driving is only possible ...
Other information:
Kia Niro 2017 (DE HEV) Service Manual: Virtual Engine Sound System Unit Repair procedures
Removal
1.
Disconnect the negative (-) battery terminal.
2.
Remove the glove box housing.
(Refer to Body - "Glove Box Housing")
3.
Disconnect the VESS unit connector (A).
4.
...
Kia Niro 2017 (DE HEV) Service Manual: Rear Center Seat Belt Retractor Repair procedures
Replacement
When installing the belt, be careful not to damage the retractor.
1.
Remove the rear seat back dust cover.
(Refer to Rear Seat - "Rear Seat Back Cover")
...
© 2016-2024 www.kniro.net


