Kia Niro: Tailgate / Tailgate Trim Repair procedures
| Replacement |
Put on gloves to protect your hands. |
|
| [Tailgate upper trim] |
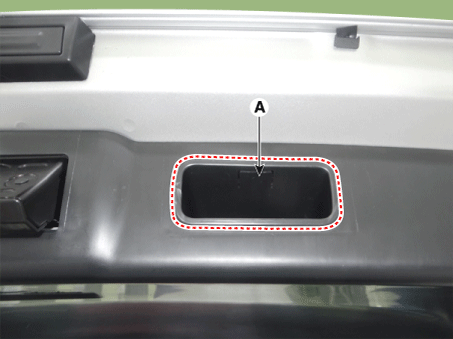
| 1. |
Using a remover, remove the tailgate upper trim (A).
|
| 2. |
Install in the reverse order of removal.
|
| [Tailgate side trim] |
| 1. |
Remove the tailgate trim (A).
|
| 2. |
Remove the tailgate upper trim (A).
|
| 3. |
Remove the tailgate side trim (A) after loosening the mounting screw.
|
| 4. |
Install in the reverse order of removal.
|
| [Tailgate trim] |
| 1. |
Remove the tailgate pull handle caps (A).
|
| 2. |
Remove the tailgate trim (A) after loosening the mounting screws and clips.
|
| 3. |
Install in the reverse order of removal.
|
 Tailgate Trim Components and components location
Component Location
1. Tailgate trim
...
 Tailgate Latch Components and components location
Component Location
1. Tailgate latch assembly
...
Other information:
Kia Niro (DE HEV) Owners Manual: Tilt & telescopic steering
A tilt and telescopic steering wheel allows you to adjust the steering wheel
before you drive.You can also raise it to give your legs more room when you exit
and enter the vehicle.
The steering wheel should be positioned so that it is comfortable for you to
drive, while permitting you to see ...
Kia Niro 2017 (DE HEV) Service Manual: Components and components location
Components Location
1. BCM (TPMS)
2. TPMS Sensor (FL)
3. TPMS Sensor (RL)
4. TPMS Sensor (RR)
5. TPMS Sensor (FR)
...


